About the ControlP5 library

One of the most useful libraries in Processing is the ControlP5 library, a library that allows the addition of various control elements (sliders, buttons, toolbars etc) in a project.

The library, written by Andreas Schegel, is by far the best interface library available in Processing at this point.

Here is the link: http://www.sojamo.de/libraries/index.php

While this library has and does everything you need, I could not find any tutorials on this. The only solution was to go through the examples Andreas has put on his website, which, don’t get me wrong, are very useful, but it did take me a while to figure out how everything works.

Using this library, I have created a user interface that allows us to use a sketch to create and modify records on a MySQL table.

I’m thinking at some point of putting together a tutorial on how to use this library together with MySQL to create a data entry interface. If you are interested in this, drop me a comment to encourage me!

About the Oomlout.co.uk site

The www.oomlout.co.uk is a very interesting site.

To begin with, they have an online shop where you can buy Arduino boards, shields and electronic components. Well, there are many sites that do exactly that.

What’s interesting is that they’ve created a great Arduino Starter kit. This kit is the best kit I’ve seen around for someone who is thinking about learning how to use the Arduino board.

First things first: the kit includes an arduino board and breadboard that are both sitting on an acrylic plate. This is exactly what I did when I started experimenting with my first arduino (although my custom arduino & breadboard combo didn’t look as nice as the one on the Arduino Starter kit).

There are also many different components available, from LEDs to a motor, a servo, sensors and even an 8-bit shift register. To buy these components at, say, Maplins, you would probably pay a lot more than £55, and that’s without the Arduino board. At £55 with the Arduino board, this kit is very well priced.

But this kit is not just a bundle of components. The great advantage of this kit is that it comes with breadboard layout sheets, that make the actual assembly of each project very easy.

All the projects are well documented on Instructables.

Here is an example of the servo motor circuit. You can see that the breadboard layout sheets are very helpful for the new users.

Open source hydrogen car

There is a fantastic article on the BBC News website, regarding a new hydrogen car:


http://news.bbc.co.uk/1/hi/sci/tech/8103106.stm

There are way too many new designs in the market for hydrogen cars and I wouldn’t normally post anything about them. What I found interesting about this one, is the fact that the manufacturer is planning on making the design plans open source. Their idea is that by doing so, they will have a lot more people actually working on the design of the car, which means that they collective intelligence will speed up the development process. Which is what happens with anything that’s open source anyway.

We are gradually moving on to a world that understands the advantages of the open source movement. I’m thinking that our grand-children will find it difficult to understand why we it took us so long to convert everything to open source…

Processing & Arduino book reviews

During the past 12 months, I have gone through a few books on Arduino and Processing. In this post, I’m going to give you my thoughts on these books.

Arduino & Processing Books

I’ll go through the books in the order I read them, which is not unfortunately the same as the order I should have read them. You’ll soon understand why.

.

Making Things Talk (Tom Igoe)
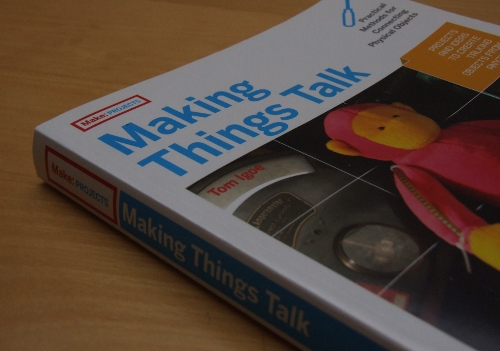
Making Things Talk

This is the first book I got and it really got me hooked into the Arduino world. Before that book, I was comfortable building computers from scratch and I did own a soldering iron, but the truth is that I hadn’t used for years. After reading this one, I ordered a few arduino boards, resistors, capasitors, sensors, servo motors and spent a fair amount of time building things.

This book really inspires you to start building things. It starts with the basics but it quickly moves to advanced concepts, techniques and projects. Every chapter includes a few projects that introduce gradually new layers of complexity. I’m always happy to grab this book and have yet another look at some of its great examples.

It’s not fair to call this book a book on Arduino, because it’s so much more than that. For me, it was not only an introduction to hardware and device hacking but also an introduction to Processing.

Prior to reading this book, I had read a lot about the Arduino board online, but this book proves that, sometimes a good book offers you more than you can find online, no matter how much time you spend searching.

If you are even thinking on using an arduino, you should buy this book.

.

Getting Started with Arduino (Massimo Banzi, co-founder of Arduino)
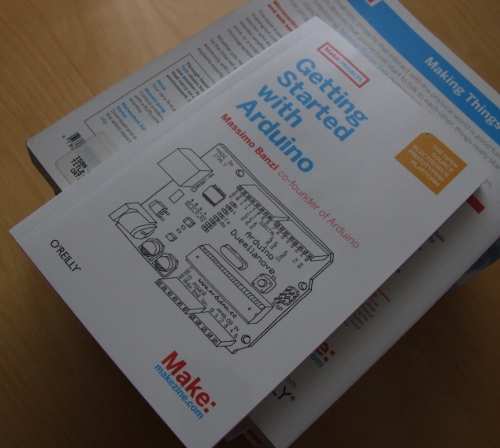
Getting Started With Arduino

This book, from Massimo Banzi, the co-founder of Arduino, was really the book I should have read first, before even going through the Arduino website. The book is only just over 100 pages long and it really serves as a very brief introduction of the Arduino platform. I bought it from a bookshop (rather than Amazon) and I knew beforehand that I may already know almost everything this book could offer. And I was almost right. Thinking back, I should have probably spent the £10 on another issue of the Make magazine.

.

Visualizing Data (Ben Fry)
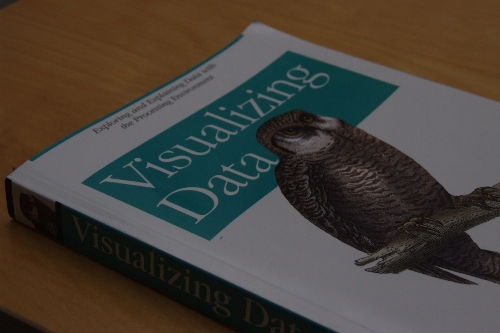
Visualizing Data

After reading the book “Making Things Talk” I realised that Processing was a very powerful yet easy to learn programming environment. Most of the other books, treat Processing as a platform for artists, which (at that time) put me off buying them. My line of work involves a lot of data analysis; when I stumbled upon this book, I thought it could help me learn about this programming environment in a way that it could be beneficial for my work.

I soon realised that this book assumes a good working knowledge of Processing, which, at the time, I didn’t have. I put it aside, and started going through “Learning Processing” and “Processing” (see below). After a few weeks, I felt confident about going back to it.

With the right background knowledge of Processing, this book clearly demonstrates that Processing is a great programming environment when it comes to creating ways of visualising data.

I have started applying some of the techniques I’ve learnt from this book at work; we have replaced some huge excel files (approx 150MB each, due to the formatting and the formulas) with a bunch of Processing sketches I wrote. Visually, the results are superior to what we used to get by printing the excel files and it now takes us 8 minutes to complete a task that used to take us about 40 minutes to complete in excel…

I give Ben Fry full marks for this book. It’s well written and to the point and the examples clearly show how Processing makes Excel look inadequate when it comes to present information visually.

.

Processing (Casey Reas & Ben Fry)

Processing

This is the best reference book on Processing. It’s written in an unusual way, in the sense that it includes interviews (not necessarily about Processing) with various artists. At the beginning, I found strange that the authors had decided to include such interviews in their book, the but, in end, I ended up enjoying reading them.

The book is well written and a must-have if you are serious about learning Processing. The theory is presented in “layers”, in other words that each chapter only gives you what you are ready to learn (based on your level) and nothing more; this is great if you use it as a textbook, but it may make your life more difficult if you try to use it as a reference.

One thing that I believe needs more work in this book (which thankfully was covered well in Fry’s book “Visualizing Data”) was the chapter on time and date.

.

Learning Processing (Daniel Shiffman)
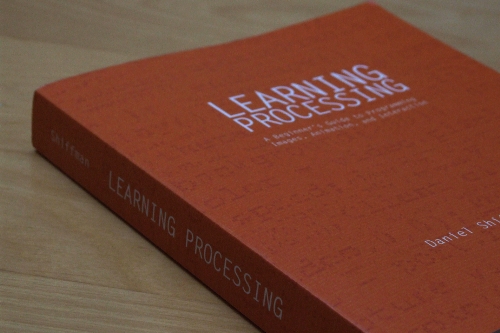
Learning Processing

The subtitle of this book is “A Beginner’s Guide to Programming Images, Animation and Interaction”, which is right on the money. This is really a beginner’s textbook and feels a lot more like your typical programmer’s book. There aren’t any interviews with artists, but there are exercises and projects in each chapter.

This is probably a good book to use as a textbook, but as I had already gone through “Processing”, I found myself turning the pages faster than I normal.

.

Algorithms For Visual Design using the Processing Language (Kostas Terzidis)
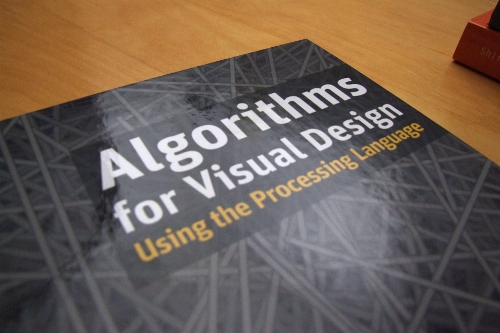
Algorithms For Visual Design (Kostas Terzidis)

This book was the latest book I got and was recommended to me by Amazon’s clever algorithm (which picked up the fact that I was collecting books on Processing). The first thing I noticed about the book what that the quality of the paper was low. Now, I know I shouldn’t be judging the books by their covers (or the quality of their pages) and the paper was probably recycled (which is something I should be supporting), but it did disappoint me a little.

The book is written by someone who knows more Java than Processing. This is generally a good thing, I thought, until I hit the chapter on GUI design… Instead of explaining how to create nice, colourful and fully customisable buttons using nothing but Processing code, this book only explains how to add the simple standard grey buttons you see everywhere. I felt that was a major omission.

To be fair, the book does have very chapters on Motion, Image processing and 3D with a lot of examples and theory to back them. Another pleasant surprise was the chapter on Physical Computing: in 25 pages the author gives a very good summary of the Arduino platform (probably better than the “Getting Started with Arduino” book!).

.

Conclusion…
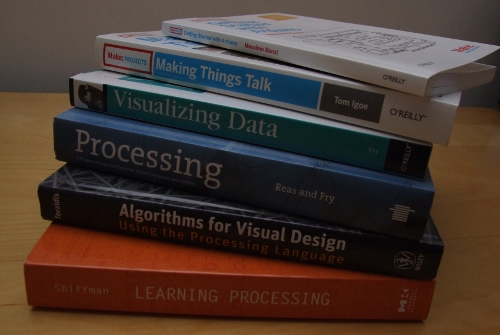
the Summary

From the books I listed above, if I had to keep three of them, I would keep “Making Things Talk”, “Processing” and “Visualizing Data”, as I feel these cover more than enough the topics I’m interested in.

Image manipulation with Processing (part 3)

This is one more example of what can be achieved with Processing.

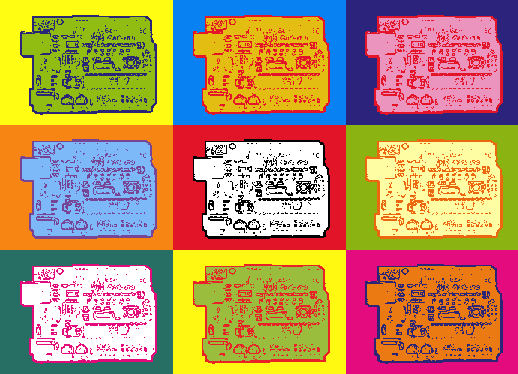
The problem here is to create a pop-art image using the famous Andy Warhol format: the same image is re-produced 9 times; each time, a different 3 colour combination is used (one colour for the background, one for the black pixels of the item and one for the white pixels of the item pictured in our photo).

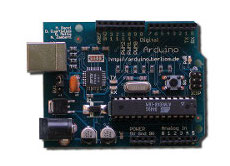
We will be using a photo of an arduino:

Arduino

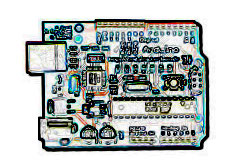
Using Gimp, we modify the image by finding the edges (filters >> Edge Detect >> Edge…). Then we get the negative image (so that the background is white), using Colours >> Invert. The result of these two simple transformations is this:

Arduino, modified in Gimp

From this point onwards, Processing takes over. Using the sketch listed further down and the modified image, we create a “warholized” image of an arduino.arduino_andy_warhol_75

The script which produces the image above is the following:

1
2
3
4
5
6
7
8
9
10
11
12
13
14
15
16
17
18
19
20
21
22
23
24
25
26
27
28
29
30
31
32
33
34
35
36
37
38
39
40
41
42
43
44
45
46
47
48
49
50
51
52
53
54
55
56
57
58
59
60
61
62
63
64
65
66
67
68
69
70
71
72
73
74
75
76
77
78
79
80
81
82
83
84
85
86
87
88
89
90
91
92
93
94
95
96
97
98
99
100
101
102
103
104
105
106
107
108
109
110
111
112
113
114
115
116
117
118
119
120
121
122
123
124
125
126
127
128
129
130
131
132
133
134
135
136
137
138
139
140
141
142
143
144
145
146
147
148
149
/////////////////////////////////////////////////////////////
// Another simple example of image manipulation
// using Processing
//
// in this example, we take an image which has been 
// modified in Gimp, and we "Warholize" it
// 
// Source: www.Arkadian.eu
//
/////////////////////////////////////////////////////////////
PImage myImage;
int randomX = 0;
int randomY = 0;
int a = 2000;
int myRed;
int myGreen;
int myBlue;
color myColor;
 
int pW; // the width of the image
int pH; // the height of the image
 
/////////////////////////////////////////////////////////////
void setup(){
 
  // Images must be in the "data" directory to load correctly
  myImage = loadImage("AW10.JPG");
  size(myImage.width * 3, myImage.height * 3);
  background(255);
 
  myImage.filter(THRESHOLD, 0.3);
 
  pW = myImage.width;
  pH = myImage.height;
 
  // Line 1, Box 1
  box( color(42,37,119),color(145,189,18), color(255,253,18));
 
  // Line 1, Box 2 
  translate(pW,0);
  box( color(228,21,41),color(228,189,18), color(8,129,242));
 
  // Line 1, Box 3
  translate(pW,0);
  box( color(228,21,41),color(235,149,190), color(44,35,124));
 
  // Line 2, Box 1
  translate(-2*pW,pH);
  box( color(120,68,150),color(125,185,248), color(247,133,19));
 
  // Line 2, Box 2   
  translate(pW,0);
  box( color(0),color(255), color(225,21,39));
 
  // Line 2, Box 3
  translate(pW,0);
  box( color(235,103,16),color(255,253,163), color(139,180,18));
 
  // Line 3, Box 1
  translate(-2*pW,pH);
  box( color(227,10,123),color(255), color(39,111,100));
 
  // Line 3, Box 2    
  translate(pW,0);
  box( color(233,34,39),color(154,189,61), color(255,249,18));
 
  // Line 3, Box 3 
  translate(pW,0);
  box( color(42,37,119),color(235,122,18), color(228,11,126));
}
 
 
/////////////////////////////////////////////////////////////
void draw(){
  // uncomment the code below, 
  // if you want to save the image
  // and exit the application
  //
  //  saveFrame("andy_warhol.png"); 
  //  exit();
 
}
 
/////////////////////////////////////////////////////////////
void box(color c1, color c2, color c3){
 
  for(int x=0; x<pW; x++){
    for(int y =0; y<pH; y++){
      color imgPixel = myImage.get(x,y);
      myColor = color(imgPixel);
 
      // If the color is black, we are using the C1 color
      if(myColor==color(0)){
        stroke(color(c1));
      }
 
      // If the color is white, we need to find out if the pixel
      // is within the area defined by the black line
      // or if it's just a pixel from the background.
      //
      // The way to figure this out, is to start checking every pixel
      // from all four directions.  
 
      if(myColor!=color(0)){
        int myLeft = 0;
        int myRight = 0;
        int myTop = 0;
        int myBottom = 0;
 
        for (int Left = 0; Left <= x; Left++){
          if (color(myImage.get(Left,y)) == color(0)){
            myLeft = myLeft + 1;
          } 
        }
 
        for (int Right = x; Right < pW; Right++){
          if (color(myImage.get(Right,y)) == color(0)){
            myRight = myRight + 1;
          } 
        }
 
        for (int Top = 0; Top <= y; Top++){
          if (color(myImage.get(x,Top)) == color(0)){
            myTop = myTop + 1;
          } 
        }
 
        for (int Bottom = y; Bottom < pH; Bottom++){
          if (color(myImage.get(x,Bottom)) == color(0)){
            myBottom = myBottom + 1;
          } 
        }
 
        // if we didn't find a black pixel from one of the 
        //four directions, then it must be a background pixel    
        if( myRight == 0  || myLeft==0 || myTop ==0 || myBottom == 0){
          stroke(color(c3)); //background  
        }  
 
        // otherwise, the pixel is located within the outer line
        //of the shape we are painting
        else{  
          stroke(color(c2));
        }
      } 
      point(x,y); 
    }
  }
}

This is one more example that shows how simple Processing sketches can be very effective in manipulating images.

I should mention at this point that we could have omitted the Gimp manipulation and used Processing for the whole project; I just wanted to keep things simple…

About Wordle.net

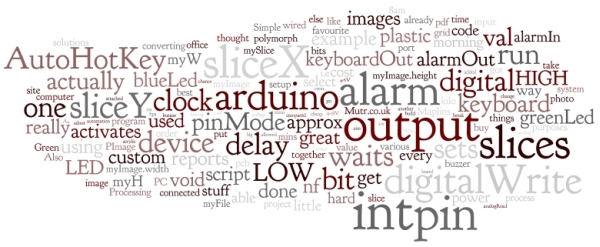
This is a very nice web tool, written in Java, that can create images like the one shown below, based on some text you provide.

The image below was created on the fly, using the rss feed of this blog.

copyright: Wordle.net

I’m sure something similar could be written Processing, but it’s nice to know that there is a web app available for something like this!