This is one more example of what can be achieved with Processing.
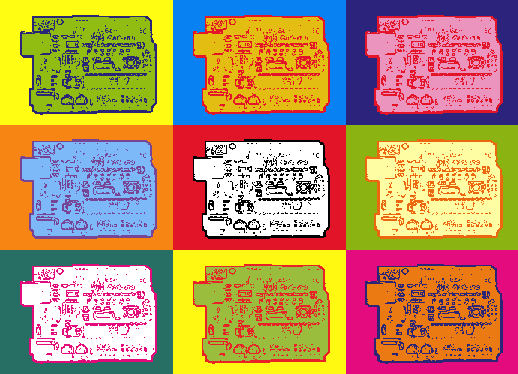
The problem here is to create a pop-art image using the famous Andy Warhol format: the same image is re-produced 9 times; each time, a different 3 colour combination is used (one colour for the background, one for the black pixels of the item and one for the white pixels of the item pictured in our photo).
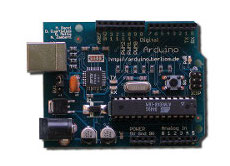
We will be using a photo of an arduino:

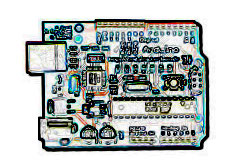
Using Gimp, we modify the image by finding the edges (filters >> Edge Detect >> Edge…). Then we get the negative image (so that the background is white), using Colours >> Invert. The result of these two simple transformations is this:

From this point onwards, Processing takes over. Using the sketch listed further down and the modified image, we create a “warholized” image of an arduino.
The script which produces the image above is the following:
1 2 3 4 5 6 7 8 9 10 11 12 13 14 15 16 17 18 19 20 21 22 23 24 25 26 27 28 29 30 31 32 33 34 35 36 37 38 39 40 41 42 43 44 45 46 47 48 49 50 51 52 53 54 55 56 57 58 59 60 61 62 63 64 65 66 67 68 69 70 71 72 73 74 75 76 77 78 79 80 81 82 83 84 85 86 87 88 89 90 91 92 93 94 95 96 97 98 99 100 101 102 103 104 105 106 107 108 109 110 111 112 113 114 115 116 117 118 119 120 121 122 123 124 125 126 127 128 129 130 131 132 133 134 135 136 137 138 139 140 141 142 143 144 145 146 147 148 149 | ///////////////////////////////////////////////////////////// // Another simple example of image manipulation // using Processing // // in this example, we take an image which has been // modified in Gimp, and we "Warholize" it // // Source: www.Arkadian.eu // ///////////////////////////////////////////////////////////// PImage myImage; int randomX = 0; int randomY = 0; int a = 2000; int myRed; int myGreen; int myBlue; color myColor; int pW; // the width of the image int pH; // the height of the image ///////////////////////////////////////////////////////////// void setup(){ // Images must be in the "data" directory to load correctly myImage = loadImage("AW10.JPG"); size(myImage.width * 3, myImage.height * 3); background(255); myImage.filter(THRESHOLD, 0.3); pW = myImage.width; pH = myImage.height; // Line 1, Box 1 box( color(42,37,119),color(145,189,18), color(255,253,18)); // Line 1, Box 2 translate(pW,0); box( color(228,21,41),color(228,189,18), color(8,129,242)); // Line 1, Box 3 translate(pW,0); box( color(228,21,41),color(235,149,190), color(44,35,124)); // Line 2, Box 1 translate(-2*pW,pH); box( color(120,68,150),color(125,185,248), color(247,133,19)); // Line 2, Box 2 translate(pW,0); box( color(0),color(255), color(225,21,39)); // Line 2, Box 3 translate(pW,0); box( color(235,103,16),color(255,253,163), color(139,180,18)); // Line 3, Box 1 translate(-2*pW,pH); box( color(227,10,123),color(255), color(39,111,100)); // Line 3, Box 2 translate(pW,0); box( color(233,34,39),color(154,189,61), color(255,249,18)); // Line 3, Box 3 translate(pW,0); box( color(42,37,119),color(235,122,18), color(228,11,126)); } ///////////////////////////////////////////////////////////// void draw(){ // uncomment the code below, // if you want to save the image // and exit the application // // saveFrame("andy_warhol.png"); // exit(); } ///////////////////////////////////////////////////////////// void box(color c1, color c2, color c3){ for(int x=0; x<pW; x++){ for(int y =0; y<pH; y++){ color imgPixel = myImage.get(x,y); myColor = color(imgPixel); // If the color is black, we are using the C1 color if(myColor==color(0)){ stroke(color(c1)); } // If the color is white, we need to find out if the pixel // is within the area defined by the black line // or if it's just a pixel from the background. // // The way to figure this out, is to start checking every pixel // from all four directions. if(myColor!=color(0)){ int myLeft = 0; int myRight = 0; int myTop = 0; int myBottom = 0; for (int Left = 0; Left <= x; Left++){ if (color(myImage.get(Left,y)) == color(0)){ myLeft = myLeft + 1; } } for (int Right = x; Right < pW; Right++){ if (color(myImage.get(Right,y)) == color(0)){ myRight = myRight + 1; } } for (int Top = 0; Top <= y; Top++){ if (color(myImage.get(x,Top)) == color(0)){ myTop = myTop + 1; } } for (int Bottom = y; Bottom < pH; Bottom++){ if (color(myImage.get(x,Bottom)) == color(0)){ myBottom = myBottom + 1; } } // if we didn't find a black pixel from one of the //four directions, then it must be a background pixel if( myRight == 0 || myLeft==0 || myTop ==0 || myBottom == 0){ stroke(color(c3)); //background } // otherwise, the pixel is located within the outer line //of the shape we are painting else{ stroke(color(c2)); } } point(x,y); } } } |
This is one more example that shows how simple Processing sketches can be very effective in manipulating images.
I should mention at this point that we could have omitted the Gimp manipulation and used Processing for the whole project; I just wanted to keep things simple…