Multiple computers on a desk…

At work, I have been working with two computers over the past few years. That involved having two screens, two mice and two keyboards on my desk. I wasn’t very pleased but I could live with it.

When I realised I would have to get a third computer, it became apparent that I needed a better solution to manage them all while maintaining my sanity…

I got a stand from allcam.biz (http://www.allcam.biz). I got the longer side arms (optional extra) and attached two 17″ on the two sides (portrait) and a 19″ in the middle (landscape).
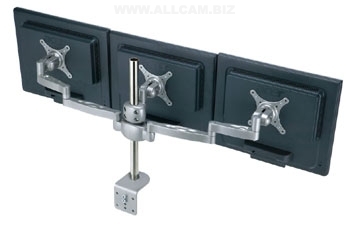
TFT stand

By effectively removing two monitor stands, I saved a lot of desk real estate. This stand does not swivel freely (you need to unscrew the bolts if you want to adjust the monitors), but this is not a big issue for me.

Then I had to solve the problem with the keyboards & mice. At first, I thought I will have to go for a hardware solution (either a kvm box from which I will only use the key & mouse inputs/outputs) or a simple usb switch that allows you to share usb devices across different computers.

But, after a bit of searching, I found that there is a free software solution to this problem: Synergy. This is a fantastic little program, that allows you to seamlessly use the same mouse and keyboard across as many computers as you want. What’s even better, you can move from one computer screen to another by just moving the mouse past the side border of one screen and into the other screen. In other words, in the same way as if the two screens are attached to the same graphics card! This is achieved by sending the keystrokes and mouse coordinates via ethernet. It works so well that, unless you were told, you wouldn’t know that the mouse is not physically connected to all three machines. And to make things even better, you can mix-and-match windows, linux and osx machines and you can copy and paste text across different machines! Amazing!

At that point, I had to get a wireless keyboard and mouse. I got the Logitech Cordless Desktop S520 from Amazon for about £30:
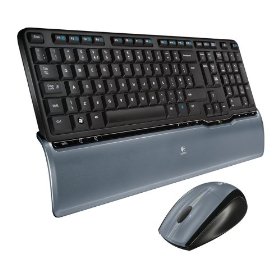
Logitech S520
This is a great solid keyboard: it has a standard shape (I can’t work with curvy keyboards), an armrest that is actually part of the keyboard, a low battery indicator both on the mouse and the keyboard and the Caps Lock and Num Lock lights on the usb receiver (which means you don’t waste any battery for them). The laser mouse is one of the best I’ve used.

By removing the multiple keyboards, mice, cables and monitor stands, I have saved a lot of space. I even have space for a couple more computers now! 🙂
WiShield from async_labs

This past week, I got my hands on a WiShield 2.0 from Async Labs (http://www.asynclabs.com/).

This is a very exiting addition to my collection of shields as it adds wifi capabilities to my projects!

There is a nice wiki page on the async_labs site (http://asynclabs.com/wiki/index.php?title=AsyncLabsWiki) and relevant code (libraries & examples) is hosted at the GitHub (http://github.com/asynclabs/WiShield).

I have a few ideas about this shield – stay tuned! 🙂

DECODE – Exhibition at the V&A Museum…

Yesterday, I visited the Decode exhibition at the V&A museum http://www.vam.ac.uk/microsites/decode/

This exhibition is about creating interactive pieces using modern technology. It’s a rather small exhibition, probably due to the fact that few artists have embraced the new technologies currently being developed.

Many of the exhibits I saw, I was already familiar with:

Flight Patterns (one of my favourites) – http://www.aaronkoblin.com/work/flightpatterns/index.html

We Feel Fine – http://www.wefeelfine.org/

Weave Mirror,  similar to the wooden mirrors from the same artist – http://smoothware.com/danny/woodenmirror.html

Flow 5.0 – http://www.studioroosegaarde.net/work_html.php?id=21&picture_id=1399

Many of the exhibits are using Processing, open Frameworks,  Arduinos (or other similar devices).

I loved this exhibition; my only issue was that it wasn’t big enough…

Custom PCB for analog input

I have been toying with the idea of designing my own circuit boards and this post is about my very first board.

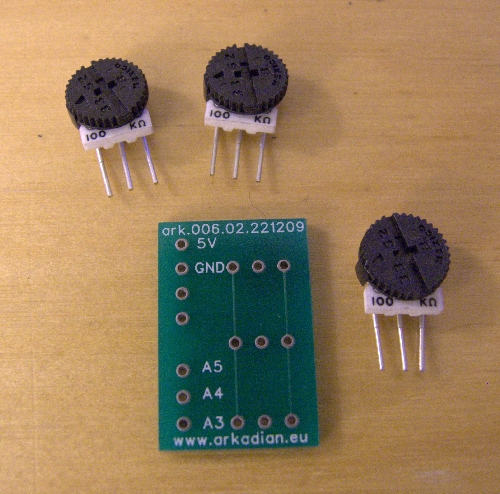
Back in December,  I decided to give it a go and design something very simple. It was meant to be more like a training exercise, rather than a board I desperately needed.  The board was going to have 3 small potentiometers; by attaching it on an arduino I should be able to get the readings on the serial port.

After looking at all the different software packages, I ended up using FreePCB to design a very simple circuit board.  I found that FreePCB was very easy to learn and use.  I used BatchPCB (a SparkFun service) to get the card printed:

http://www.batchpcb.com/index.php/Products/26633

The guys at BatchPCB were kind enough to send me two boards (I only ordered one). The order took approx 4 weeks, which is not bad, if you are after the cheapest possible way of getting a board printed. I paid $14, including delivery to London.

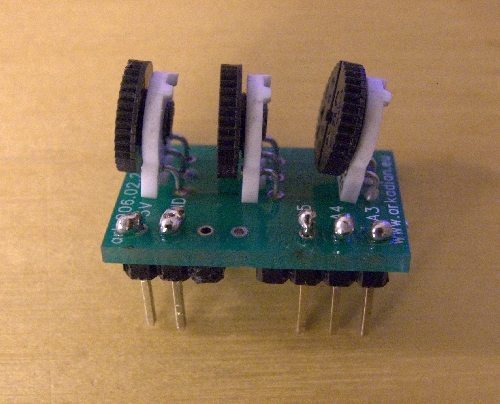
Front side, with the potentiometers. By the way, when I got the board back, I realised that I got the numbering wrong: instead of A5, A4, A3, it should read A0, A1, A2…

DSCF1190_w500

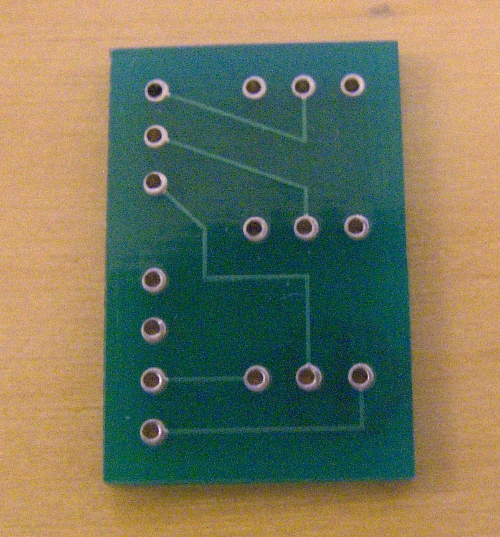
Back

DSCF1180.RAF_w500

pins and pots soldered in position (I know, I need to work on my soldering skills…)

DSCF1192.RAF_w500

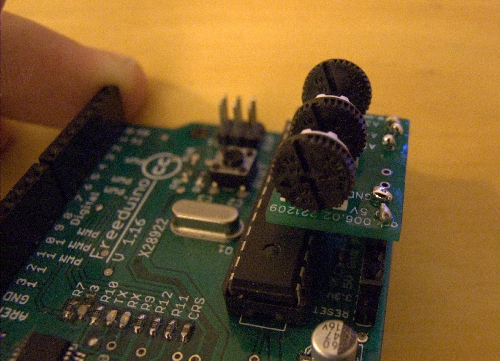
The mini board on a freeduino board

DSCF1194.RAF_w500

The following Arduino code works nicely for this example:

1
2
3
4
5
6
7
8
9
10
11
12
13
14
15
16
17
18
19
20
21
22
23
24
25
26
27
28
29
int sensorPin1 = 1;
int sensorValue1 = 1;
 
int sensorPin2 = 2;
int sensorValue2 = 2;
 
int sensorPin0 = 0;
int sensorValue0 = 0;
 
void setup() {
  Serial.begin(9600);
}
 
void loop() {
 // read the value from the sensor:
 sensorValue0 = analogRead(sensorPin0);
 sensorValue1 = analogRead(sensorPin1);
 sensorValue2 = analogRead(sensorPin2);    
 
 //print the value on the terminal
 Serial.print(sensorValue0);
 Serial.print(" \t ");
 Serial.print(sensorValue1);
 Serial.print(" \t ");
 Serial.print(sensorValue2);
 Serial.println("");
 
 delay(100);
}

As I said before, this was just a test. Hopefully my next board will be part of a more exciting project!

Dropbox.com – Or “How on earth did we do this before”?

I first heard about this service on SparkFun’s blog.

Dropbox has a very simple concept: it allows you to seamlessly share files with many computers and users. It’s easier to use than a USB key. Installation is a breeze; the software works integrates with windows and the web interface (when you need it) is extremely easy to navigate! 🙂

You get 2GB worth of free space – which is very handy if you want to send files to friends or move them from one PC to another.

No more emailing files, spreadsheets, documents, photos, pcb designs etc to myself!

I installed it on my machines and recommended it to my friends – every machine should have this gem installed!

http://www.dropbox.com

Eye-Fi SD Card

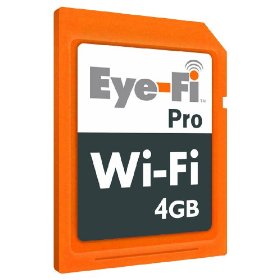
This is an  SD card with a twist: it also has Wi-Fi which means that, if you use it with a digital camera, it allows you to send photos you’ve just captured on Flickr, Picasa, Facebook, email them or simply back them up online.

Sounds like a simple & great idea.

The site of the company behind this product is here: http://www.eye.fi/

Amazon is selling the Eye-Fi Pro 4GB cards  for about £120 in the UK. http://www.amazon.co.uk/gp/product/B002RL9ALU/

Eye-Fi Pro
Eye-Fi Pro

There is a slightly cheaper model, Eye-Fi Share Video, which is also on Amazon for about £70.  http://www.amazon.co.uk/dp/B002RL9ALK

It would be interesting to see if this ends up in an Arduino shield at some point. In the mean time, the best Wi-Fi solution for the arduinos seems to be the WiShield.