Robot Challenge 001

autonomous_vehicle_001

A friend of mine and I decided to start a robot challenge. The aim is simple: each one of us will build a robot, an autonomous vehicle that will be able to get out of a maze on its own. It won’t be remote controlled but it can talk to a remote computer for instructions (i.e. all the “thinking” can be done on a computer and the actual vehicle can be a “dump” unit that simply sends the sensor data to the external machine and performs the movements dictated by the external machine.

We’ve agreed to have the actual competition at some point in January.

For my autonomous vehicle, I’ve decided the following:

  1. The motor section will be built using hardware from VEX Robotics.
  2. The “brain” section will be using a RaspberryPi and maybe an Arduino (as an internediate  between motors/sensors & RPi).
  3. Sensors: the proximity sensors are TBC. I’m experimenting with a few options. I will most likely add a compass module too.
  4. The body of the robot will be made by film cans, giving it an “R2D2” look (without arms/legs though).
  5. I will add a camera at the top. Not required for the competition but I have a spare one at home.

I’ve been working on the design of the motor section. Here is my current blueprint:
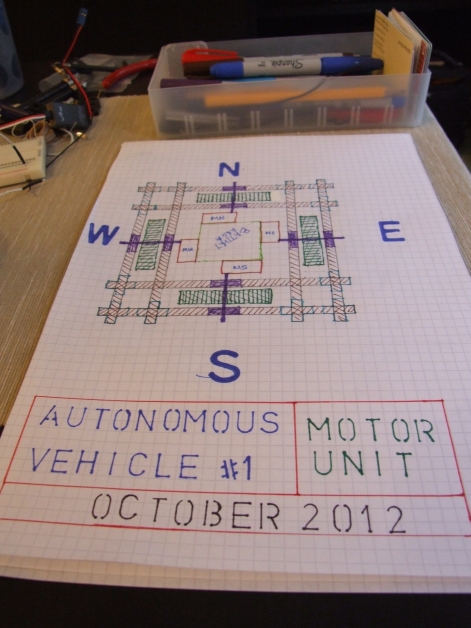
first_blueprint

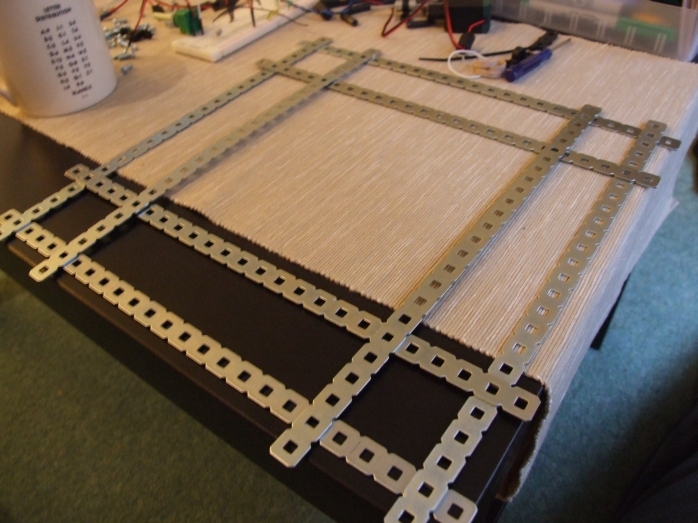
Here is a concept of the base:

motor_frame_concept

I’m using omni-directional wheels from VEX, which means I can have 2 wheels on the X-axis and 2 wheels on the Y-axis:
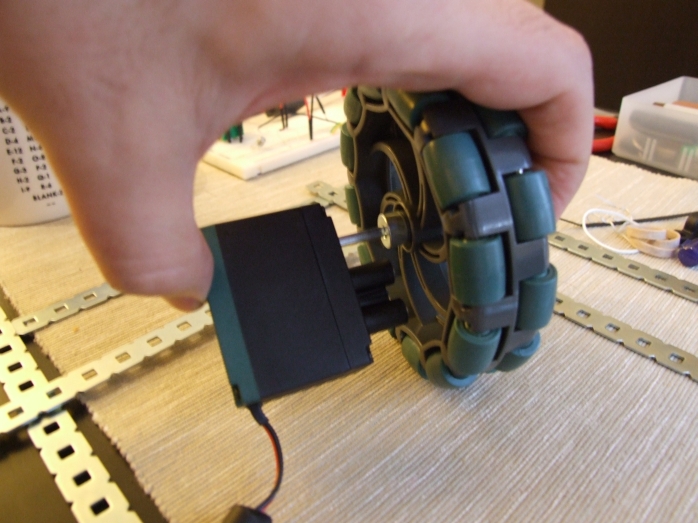
motor_wheel_unit

So far, I’ve only made a small “sample” order from VEX Robotics, in order to make sure that I can control everything through RPi/Arduino. If all goes well, I should have the second & final VEX order delivered before the end of the month.

Icons, photos & vectors for projects

This is a post that I will edit from time to time, adding more links as I find them.

1. This company has free and commercial icons: dryicons.com. I like the iconika icons (available in red, blue, green, grey – here is a sample in blue: http://dryicons.com/icon/iconika-blue-icons). One thing I really appreciated from this site, is that you get the option to download the icons at the size you need. This saved me a lot of time messing around with image resizing…

2. Fotolia.com is a good site (the only site I have personally paid so far to buy photos and vectors). Not as cheap as it used to be, but still good value, considering the amount of material that’s posted there.

3. Vector Stock sells vectors from various creators: www.vectorstock.com
I like the concept of the hand-drawn icons from this artist: Azzzya. This is a great place to pick up nice designs for presentation backgrounds and office reports.

4. Another interesting site is Wikimedia. You can use whatever you need, but you may have to search a lot to find something you need/like. Definitely worth looking into, if you have the time.

openWRT device from Omnima UK

29 Aug 2011
Omnima UK sell a tiny little board for less than £40, that runs on openWRT Linux and has ethernet, WiFi and a USB port. It seems to be a great base for simple projects, when we need more power than one arduino.

Link to product

I’ve ordered one to try something I have in mind.

Btw, at the openWRT site, there is a VM available. I downloaded and tried it yesterday, but I had problems connecting USB peripherals…. Never mind. I have to say I loved the web interface and the precompiled binaries and the fact you can ran python on it!

11 Sep 2011
I’ve now received the device. It runs Fonera (have a look at some screenshots and more info here). Easy to access through a web interface. I tried to load the latest Fonera software and it didn’t quite work; now the device won’t boot. I’m able to log in to it using telnet and a serial cable, but I haven’t been able to load the old bin file yet… I’ll keep you posted…

Take Snapshots using Python

1
2
3
import ImageGrab
img = ImageGrab.grab()
img.save('arkadian.png','PNG')

A quick and easy way to take a snapshot of your current window.
You can always use JPG, but the quality is better in PNG.

Works in Windows and requires PIL.

Merging pdf files in Python with pyPDF

Here is a very simple python script that marges two pdf files, using the pyPDF library.

1
2
3
4
5
6
7
8
9
10
11
12
13
14
15
16
17
18
19
20
21
22
23
import os.path
import pyPdf
 
pdfOne = "C:\\a.pdf"
pdfTwo = "C:\\b.pdf"
 
merged = "C:\\c.pdf"
 
if os.path.exists(pdfOne) and os.path.exists(pdfTwo): 
 
	output = pyPdf.PdfFileWriter()
 
	pdfOne = pyPdf.PdfFileReader(open(pdfOne, "rb"))
	for page in range(pdfOne.getNumPages()):
		output.addPage(pdfOne.getPage(page))
 
	pdfTwo = pyPdf.PdfFileReader(open(pdfTwo, "rb"))
	for page in range(pdfTwo.getNumPages()):
		output.addPage(pdfTwo.getPage(page))
 
	outputStream = open(merged, "wb")
	output.write(outputStream)
	outputStream.close()