I love automation in the office, as it elliminates the chance of human error and it gives us time to actually do other things, while giving the boring stuff to our faithful servants, the computers.
We used to have a very time-consuming task that had to be done every morning. It involved downloading a number of reports from various websites, converting them to pdf and merging the pdfs to two different pdf files. The whole process, when it was done manually, used to take approx 40 mins and we had to get it done first thing in the morning.
Using AutoHotKey, I wrote a script that downloads the reports for us every day. It takes the program approx 25 mins to run all the reports. We use one of our spare desktops to run the script, so that we can do other stuff while the autohotkey is working hard for us. For those not familiar with AutoHotKey: the best way to describe it is as a macro language for Windows.
That was a great improvement compared to the manual process, but I thought I could do better than this. This was when I started learning about the arduino board. My idea was as follows: what if I could create a little device with an alarm clock set at 8am every morning, that logs in to the computer and activates the autohotkey script?
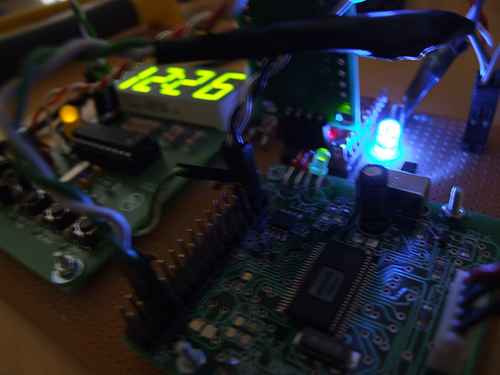
I got an alarm clock kit from Maplins, a custom keyboard on a pcb from X-Keys and an arduino mini and I wired them in such a way that, at 8am the alarm clock goes, activates the arduino, the arduino shuts down the alarm clock and activates the custom keyboard; the custom keyboard then types the login and password to the desktop that’s attached to and activates the autohotkey script. By the time we get to the office, the reports are already downloaded and ready for us. Simple really!
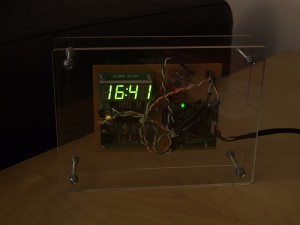
Here is an image of the device. I mounted it on an acrylic photoframe from Muji.

Some of you will say that I’m using a hammer to break an egg. Possibly… But please note that, for security reasons I was not allowed to leave the computer on and unlocked during the night and that the autohotkey actually needs the PC to be on and a user to be logged it (so I couldn’t run it as a service). Also, I know that some of you may be able to wire something like this up without the need of an arduino, but, I admit it, I don’t have a degree in electronic engineering and I am not planning on getting one in the near future! 🙂 I was able to build and get this little device up and running within a few hours.

In this example, my device only “wakes up” my machine, but, with very small modifications it could even start the PC (i.e. I could have wired it up in such a way that it actually shorts the pins that connect to the power button).
The most expensive part of this device was the custom keyboard, which (including delivery and import tax) cost me about £85.
One of the things I did manage to do was to remove the transistor from the alarm clock that was converting the voltage from the 9-18V to 4-6V. Then I was able to run it from the power provided by my usb port!
The arduino code was not really hard, just a modified version of the blink example!
1 2 3 4 5 6 7 8 9 10 11 12 13 14 15 16 17 18 19 20 21 22 23 24 25 26 27 28 29 30 31 32 33 34 35 36 37 38 39 40 41 42 43 44 45 46 47 48 | int alarmIn = 2; // select the input pin for the alarm int alarmOut = 9; // select the output pin for the alarm int keyboardOut = 8; // select the output pin for the keyboard int greenLed = 13; // Green LED connected to digital pin 13 int blueLed = 7; // Green LED connected to digital pin 13 int val = 0; void setup() // run once, when the sketch starts { pinMode(alarmIn, INPUT); pinMode(greenLed, OUTPUT); // sets the digital pin as output pinMode(blueLed, OUTPUT); // sets the digital pin as output pinMode(alarmOut, OUTPUT); // sets the digital pin as output pinMode(keyboardOut, OUTPUT); // sets the digital pin as output Serial.begin(9600); // open the serial port at 9600 bps: } void loop() // run over and over again { val = analogRead(alarmIn); // read the value from the alarm if (val>200){ delay(1000); // waits for a bit digitalWrite(greenLed, HIGH); // sets the LED on delay(500); // waits for a bit digitalWrite(greenLed, LOW); // sets the LED off } if (val<200){ digitalWrite(blueLed, HIGH); digitalWrite(alarmOut, HIGH); delay(2000); // waits for a bit digitalWrite(blueLed, LOW); digitalWrite(alarmOut, LOW); delay(500); // waits for a bit digitalWrite(keyboardOut, HIGH); delay(500); // waits for a bit digitalWrite(keyboardOut, LOW); delay(1000); // waits for a bit more } // for Debuging purposes... Serial.print("Value on Pin2: "); Serial.println(val); } |
Needless to say that I had not added the buzzer on the alarm clock pcb. As you can see on the code, I was using analog in from the buzzer to Pin 2.
This device is, I think, a perfect example of what Arduino is meant to be used for, i.e. helping people creating simple solutions to everyday problems. The program on the Arduino is very straight forward and underlines the fact that sometimes solutions can be easier than previously thought…
Hey, cool project! I can see where it could be said that you are going overboard, but you are learning and that is key. I have an x-keys matrix and an arduino (as well) and it never occurred to me to wire them together. I am saving my x-keys for a flight simulator cockpit (yeah, I know…) but it might be fun to play with in other ways before I dedicate it.
Keep it up and I look forward to seeing more projects from you.
By the way, you couldn’t use a cron-job to assemble the files for you?
Hey Kevin, thanks for your comments.
Well, the problem is that the various websites, where we download the reports from, use flash even for the authentication screens and create the pdf files on the fly, i.e. I could not just use cron and a wget script on a server and grab them all in one go (believe me I tried to do that for months!). The manual process of downloading all these files involves approx 100 clicks on the screen which are slightly different every day (which is why I’m using autohotkey to automate that part). The problem is that Autohokey (as far as I know) cannot run as a cron job on a windows machine that’s locked.
My other problem was that, for security reasons, all the PCs at work have their screens locked if nobody is using them for like 5 mins. I wasn’t allowed to change that.
If I could remove the requirement for a login & password at boot (which would never happen at work), I would wire the arduino directly on the power pins of the motherboard, so that it just boots the PC up with the alarm goes. I could have the autohokey script on the Startup folder and I would save the X-keys board for another project (a flight simulator sounds like a cool idea 🙂 )…